Setting up Manjaro Linux using Hyper-V
Make sure to download an iso of Manjaro. Manjaro Linux
Hyper-V Setup
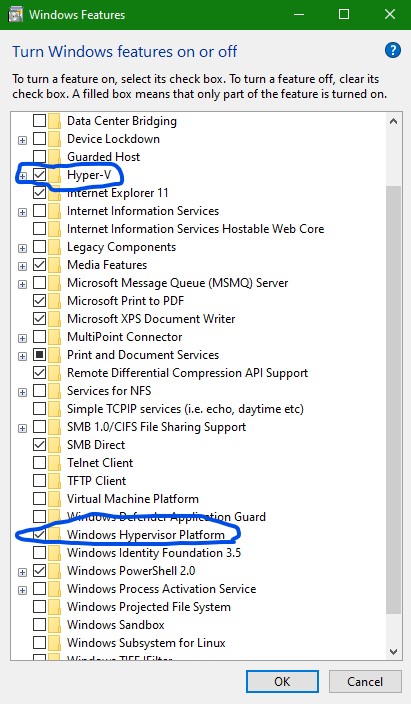
Ensure you have hyper-v and the windows hypervisor platform enabled. If you are running windows 10 home edition, you will need to upgrade to pro for this to be available.
Done with help from forum article Installing Manjaro in Hyper-V with Enhanced Session Support
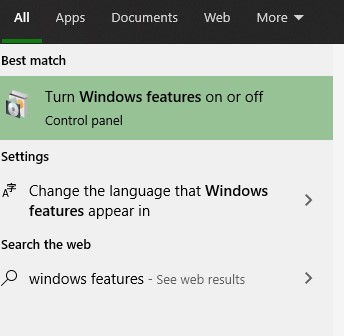
Go to the “Turn Windows features on or off” menu.
Ensure the “Hyper-v” and the “Windows Hypervisor Platform” are enabled. If this is the first time you are enabling this, you will need to restart your computer.
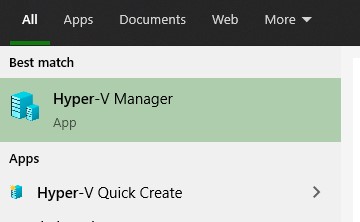
You will now be able to load the Hyper-V Manager.
Prerequisite Settings
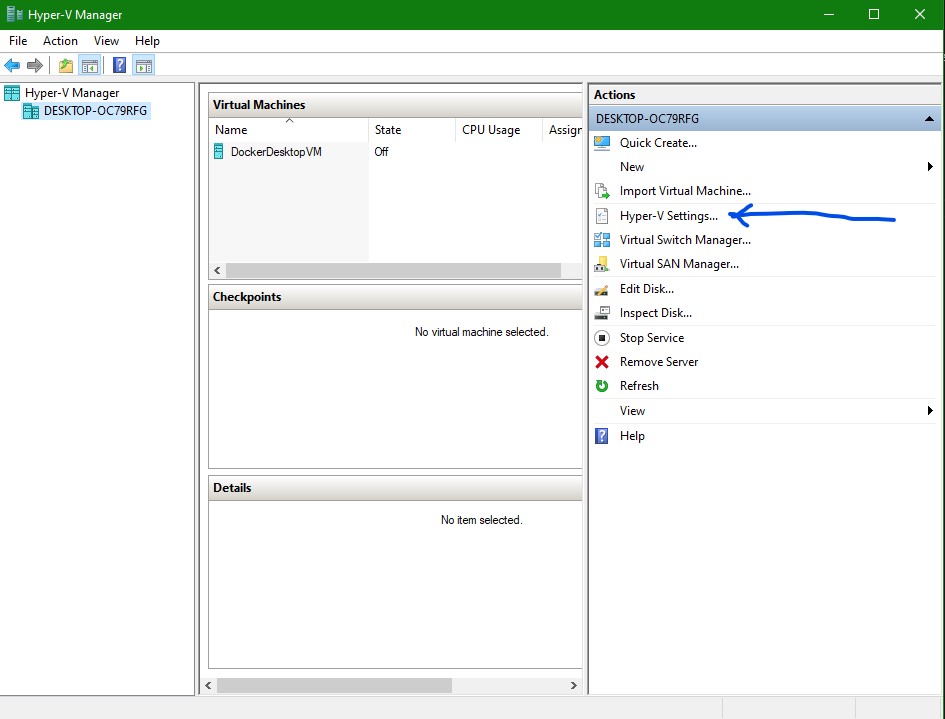
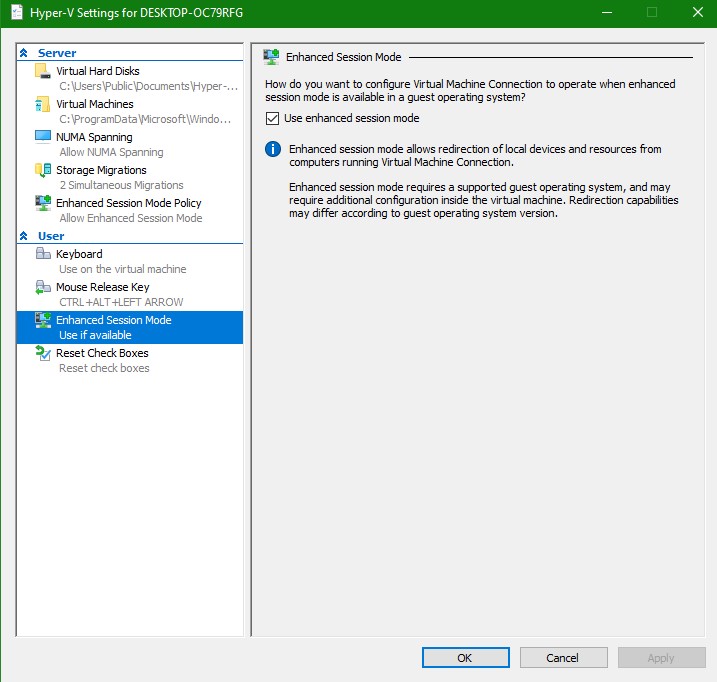
We will need to make a tweak to the Hyper-V settings
Ensure the “Enhanced Session Mode” is enabled. This will greatly increase the performance and responsiveness of our VM.
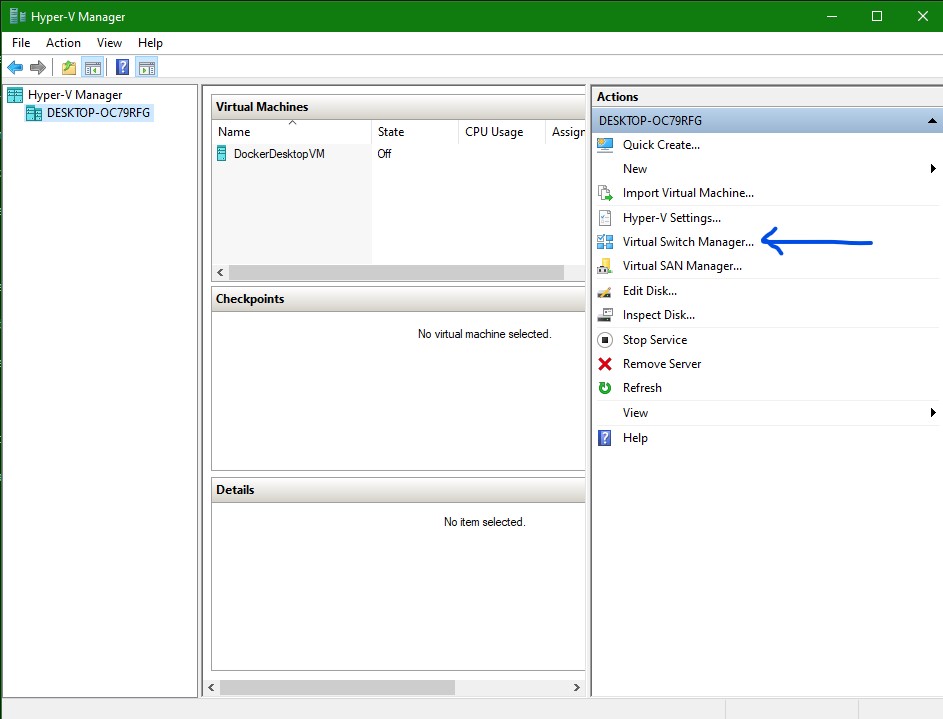
Now we need to go into the virtual switch settings.
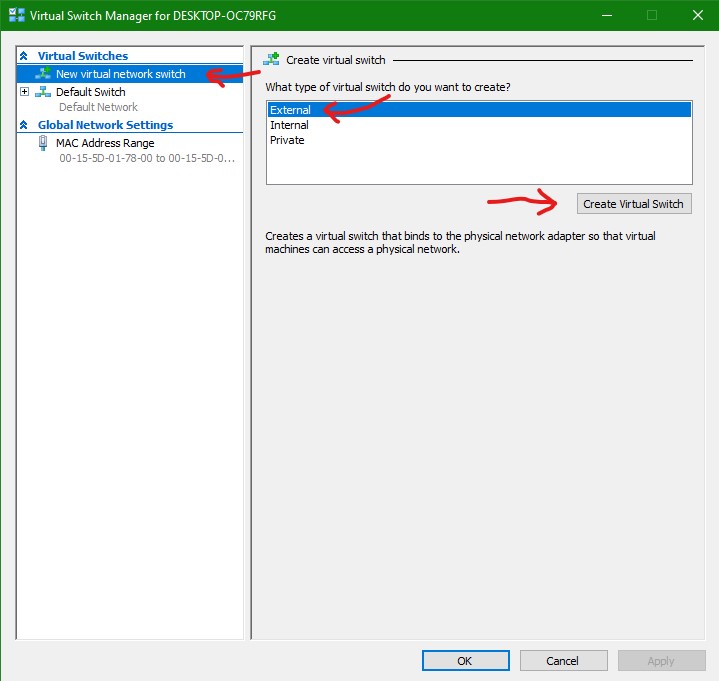
Create a new virtual switch, of the type “external”. Then click “Create Virtual Switch”.
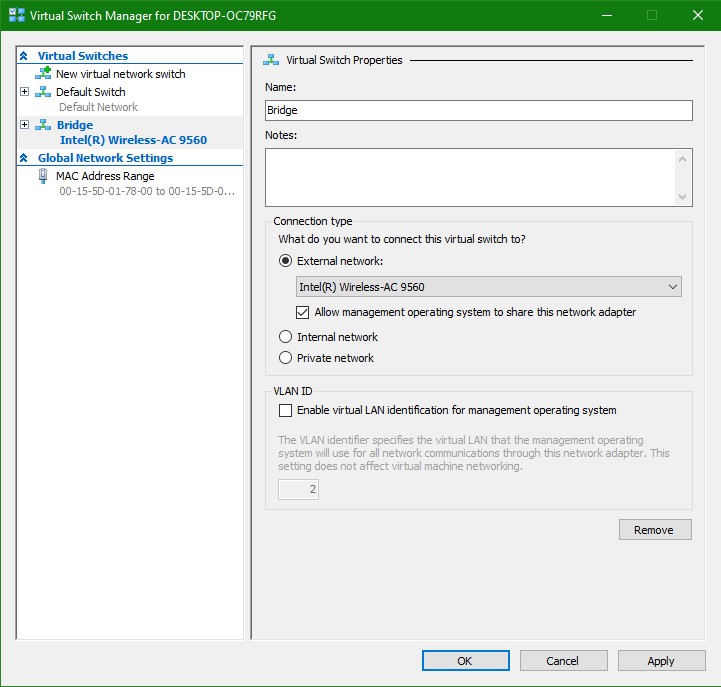
In the newly create switch’s settings, let’s name it “Bridge”. (This can be anything, just a way to identify the connection type). Make sure the connection interface is a valid one, and that it allows the host system to share the interface. Click “Apply”. It will warn you that it may disrupt connections, proceed.
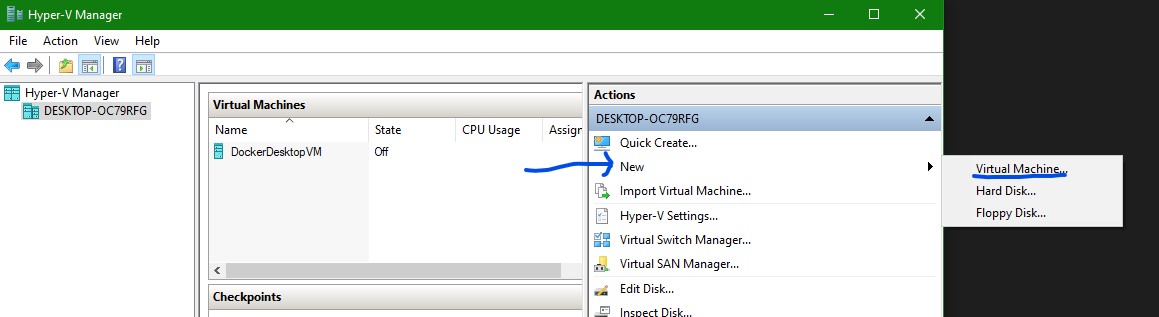
Creating our VM
Now that we have the settings ready and a virtual network switch created, Let’s create the VM. Select “New” then “Virtual Machine”.
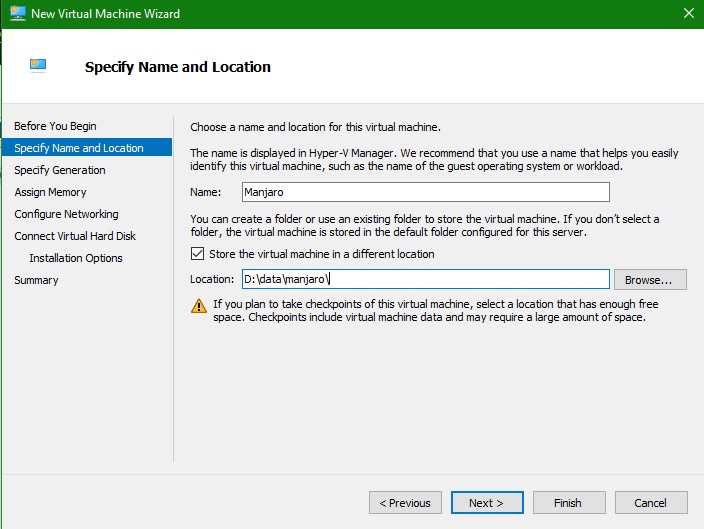
In the dialog that opens, we want to create custom settings, so make sure to click “Next” instead of “Finish”.
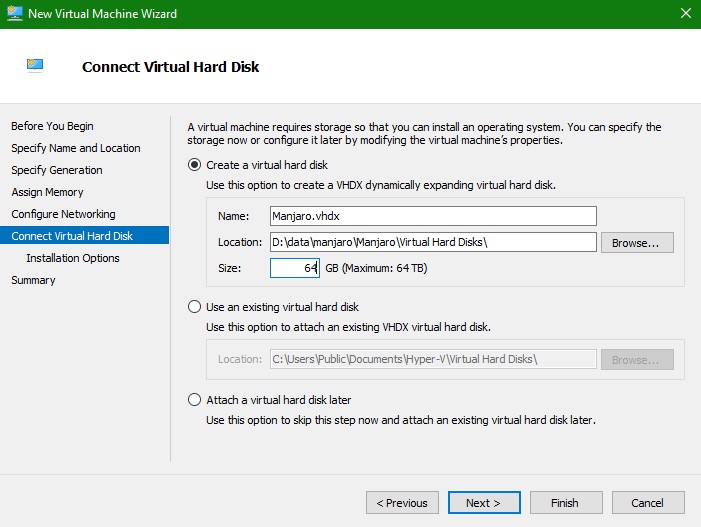
To make things simple, I’m naming the machine “Manjaro”, and I am specifying where I want it’s data to live. Make sure you pick a hard drive with a decent amount of free space.
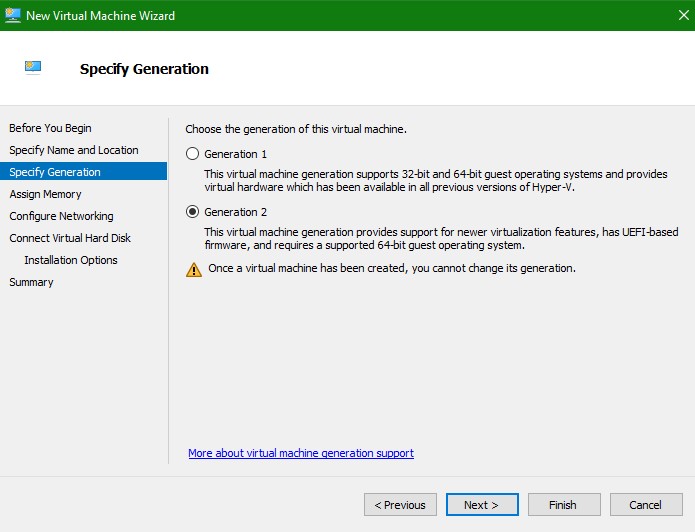
For the sake of this exercise, we are making a Generation 2 Machine.
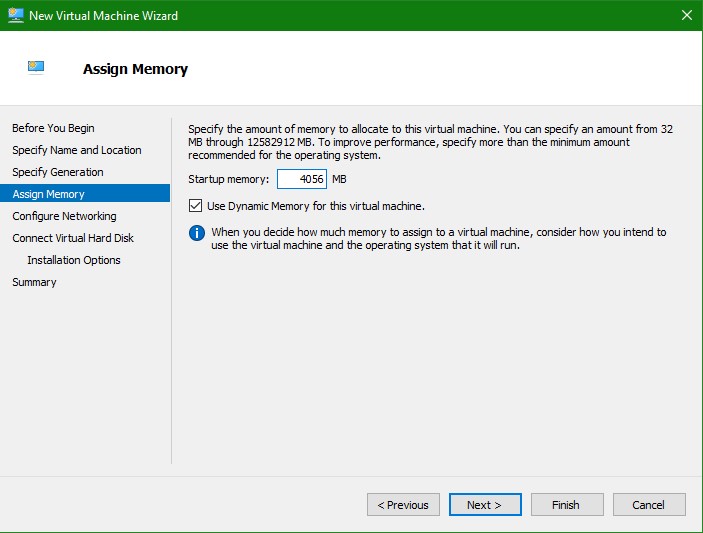
For Memory, since this is a graphical desktop environment, I like having a minimum of 4g to play with. Leaving dynamic memory on so it can borrow more if it needs to.
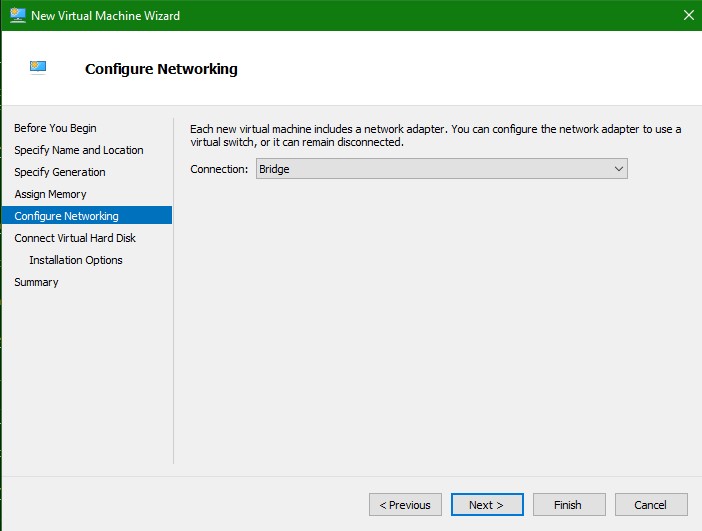
Networking is where we make use of that “Bridge” connection we made earlier. Select it. (or whatever you named it)
For hard drive, I like a nice round 64g.
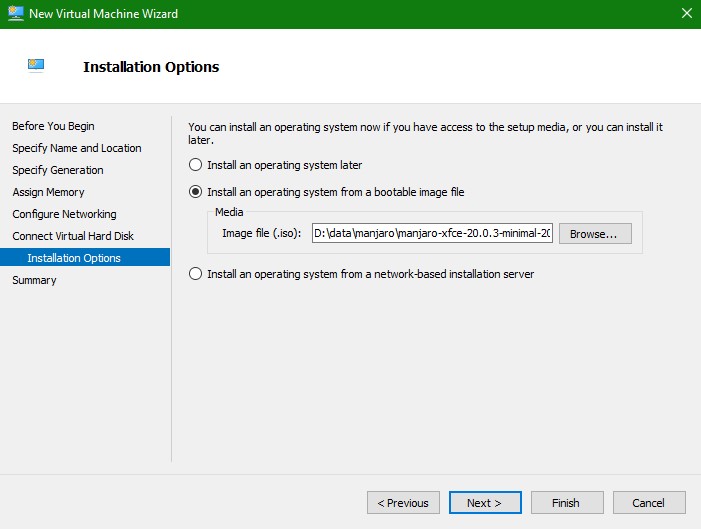
I already have the manjaro-xfce-20.0.3-200606-linux56 iso ready to go, so I select that for the installation media. This will insert the iso (virtual dvd) into the VM’s virtual dvd drive.
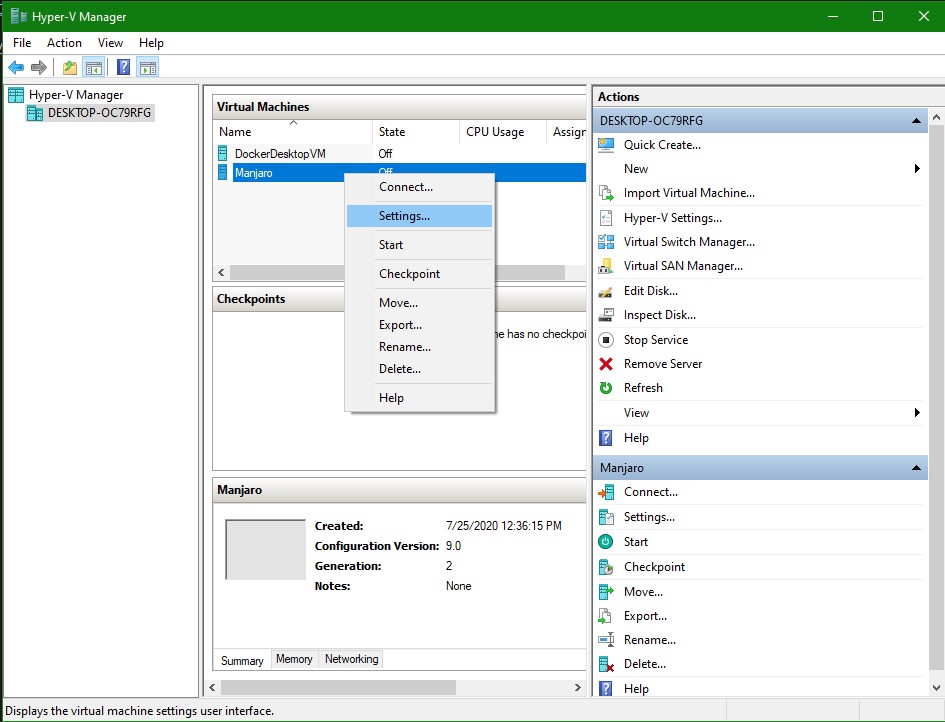
Accept the summary, and watch it build! Now we can’t launch yet, we have a little more machine settings to adjust. Right click your new Manjaro machine and select settings.
The Manjaro ISO will only run if you disable the VM’s “Secure Boot” Option. So, turn it off and apply.

Now we can actually start our machine! Double clicking and the selecting “start” will get this booted up.
Installing Manjaro
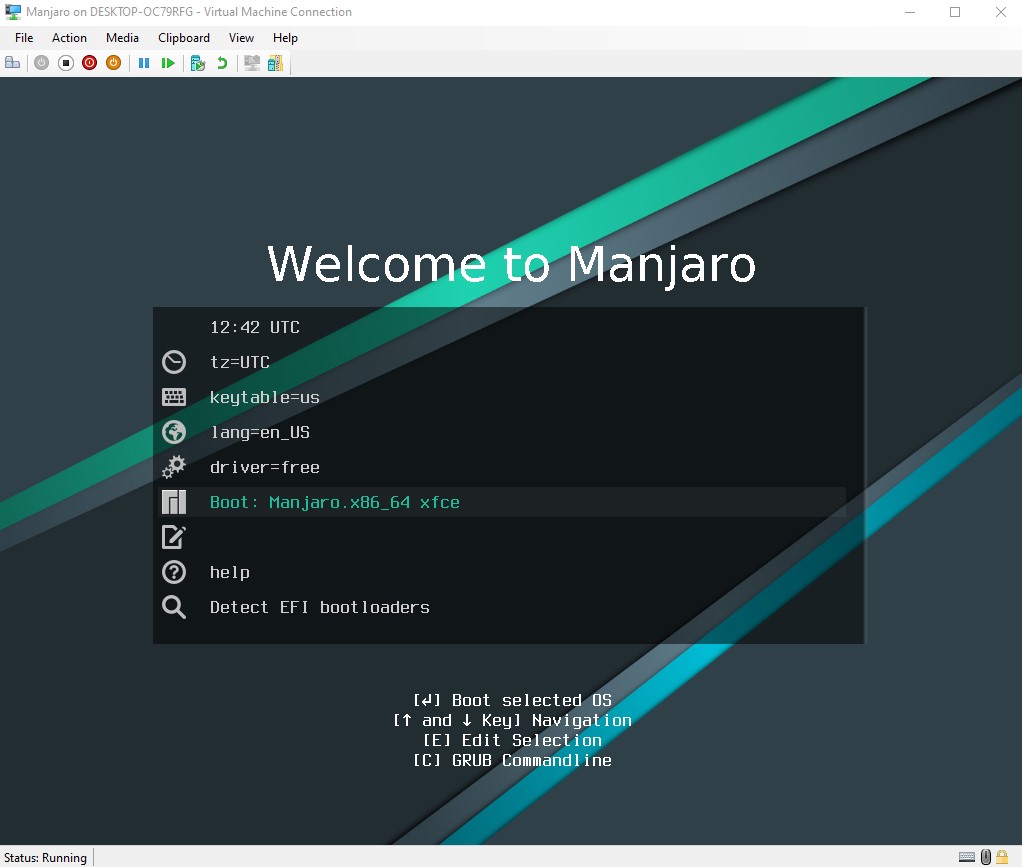
The First screen we will see will be the bootloader. You can either push enter, or arrow around to change the timezone if you feel like it.
This is the process of booting into “Live” mode for Manjaro. This does not actually install it to our virtual hard drive yet.
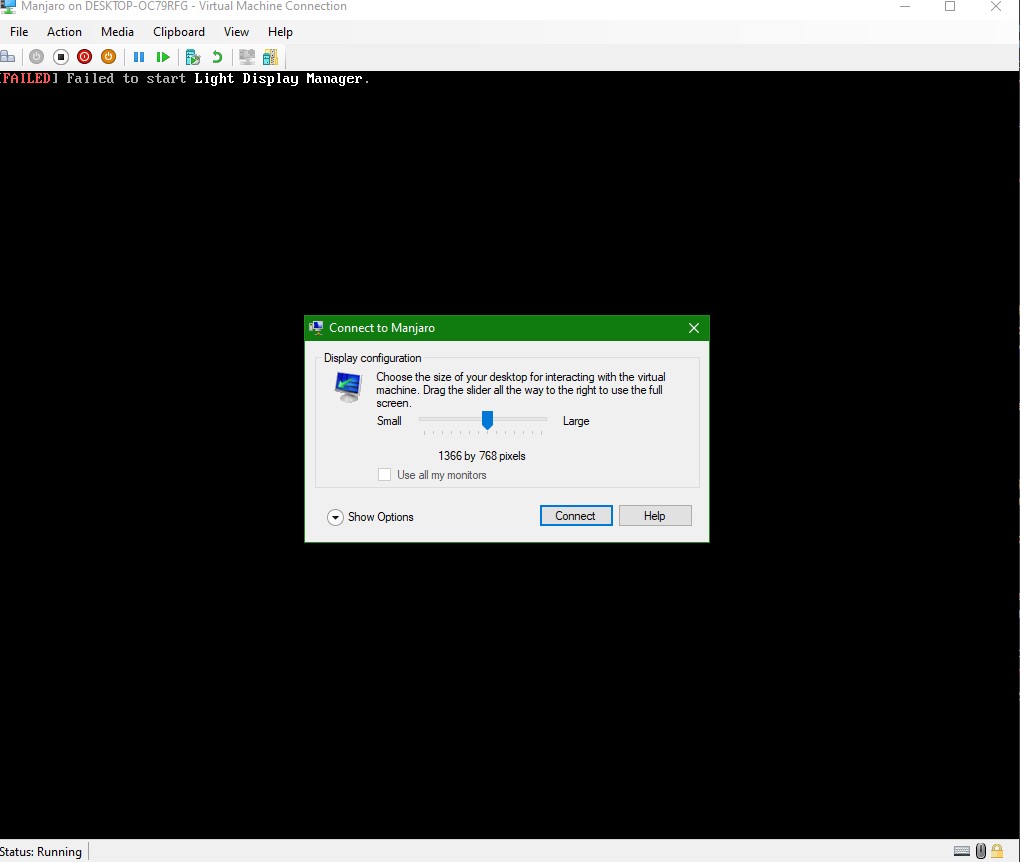
You will see it run through pages of text and console logs, but eventually “hang”, usually around messages like “Light Display Manager” and “TLP System Startup/Shutdown”. This is because the display drivers for this version of Manjaro don’t play nicely with hyper-v. We have a workaround though!
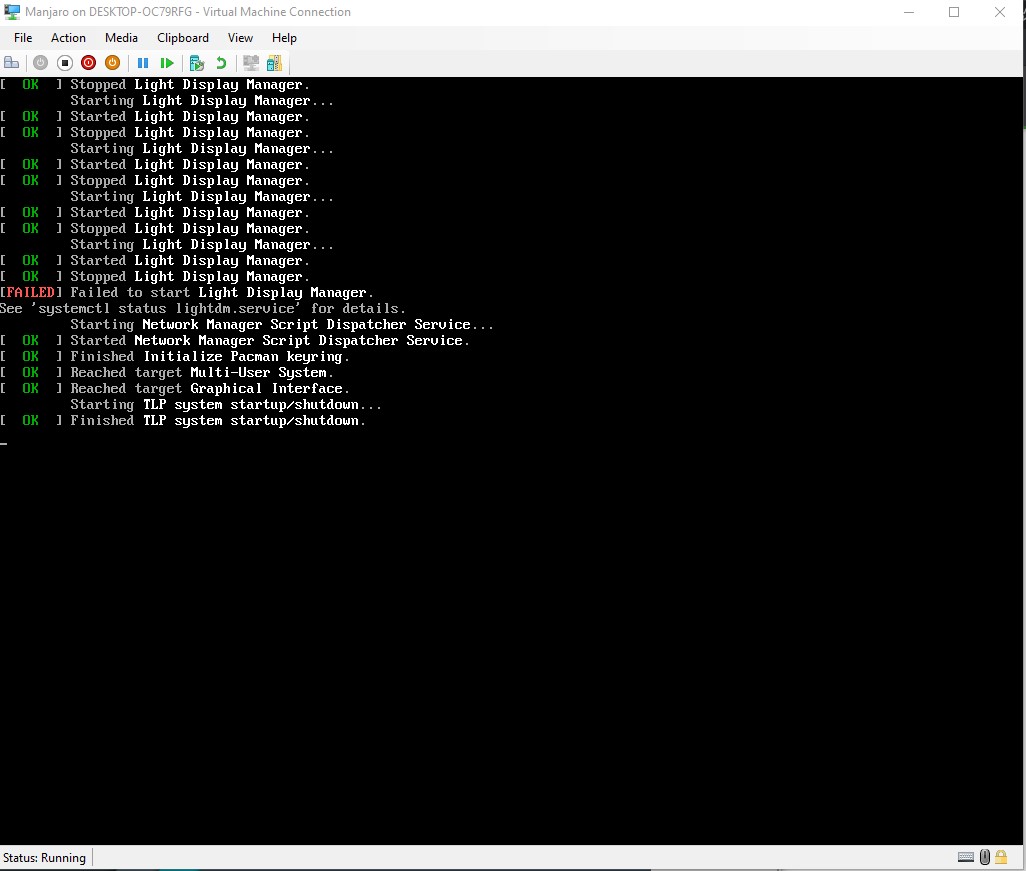
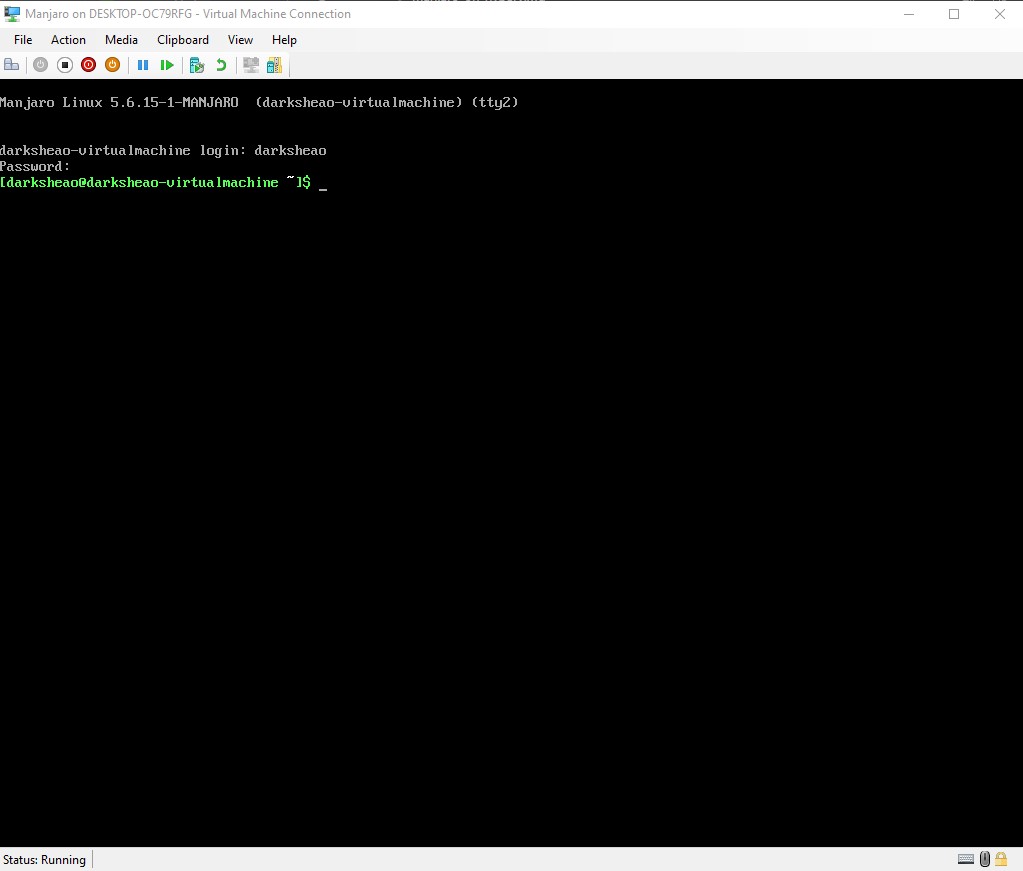
Push Control + Alt + F2. This switches us to a tty console.
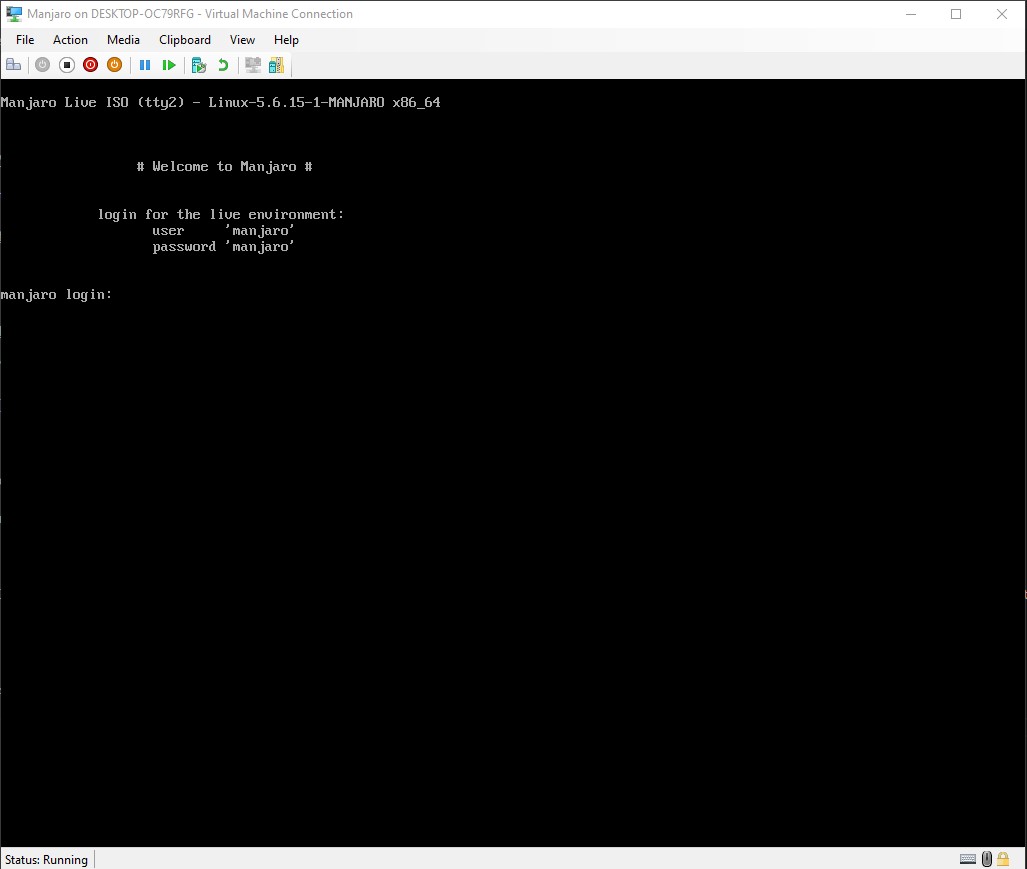
Login with the default “manjaro” user, passowrd “manjaro”.
You will be presented with a good old console prompt.
We need to run these commands to install and setup the graphics drivers:
su
pacman –Sy
pacman –S xf86-video-fbdev
systemctl restart lightdm
Explaination:
su– Change to root user (the text will go red as a warning)pacman -Sy– Sync the PACkage MANager with the remote repositoriespacman -S xf86-video-fbdev– Search for and attempt installing the xf86 video drivers You will need to press enter when it asks you if you want to install things.systemctl restart lightdm– Let’s reboot just the display system!
Now we can actually see the desktop! Let’s Go ahead and install manjaro.
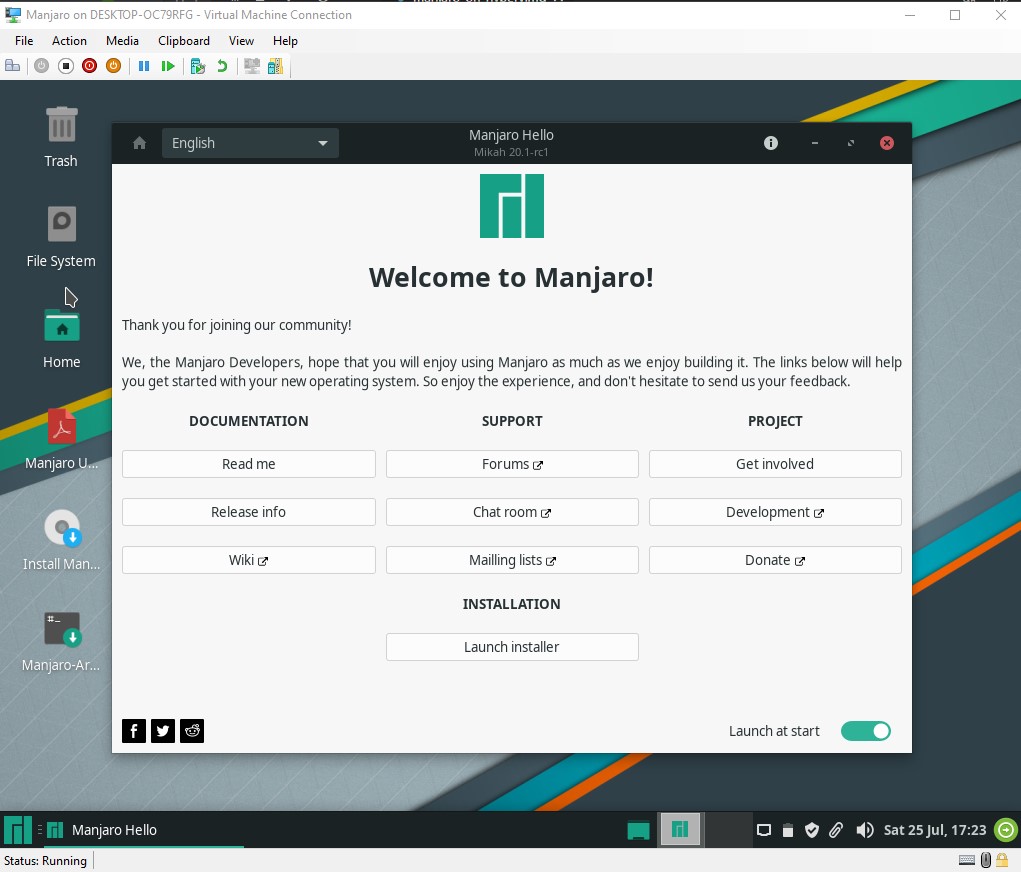
This desktop we are seeing is the “Live” booted Manjaro. Unless we install, we don’t actually get to keep anything we do here. In my case I had a pop-up where “Launch Installer” is an option, if that pop up didn’t load for whatever reason, the CD shaped icon that says “Install Manjaro” also launches the installer.
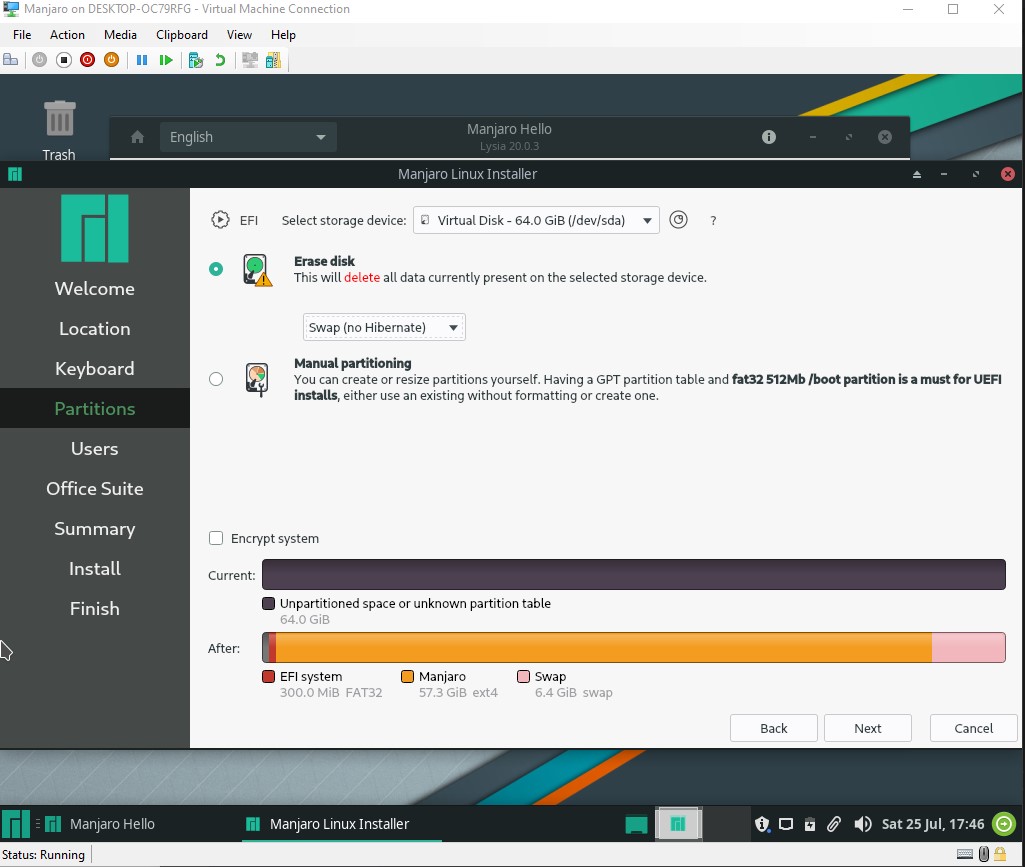
For the Hard Drive Install location, we want to make sure that the virtual hard drive is selected, the one that we set up in an earlier step. We want to use the entire disk, and just for giggles I’m going to enable a swap file, without hibernation.
For the Users section you will create your username and password, and set up the administrator (root) password.
You can the option here to install an office suite if you desire, in my case I’m skipping that.
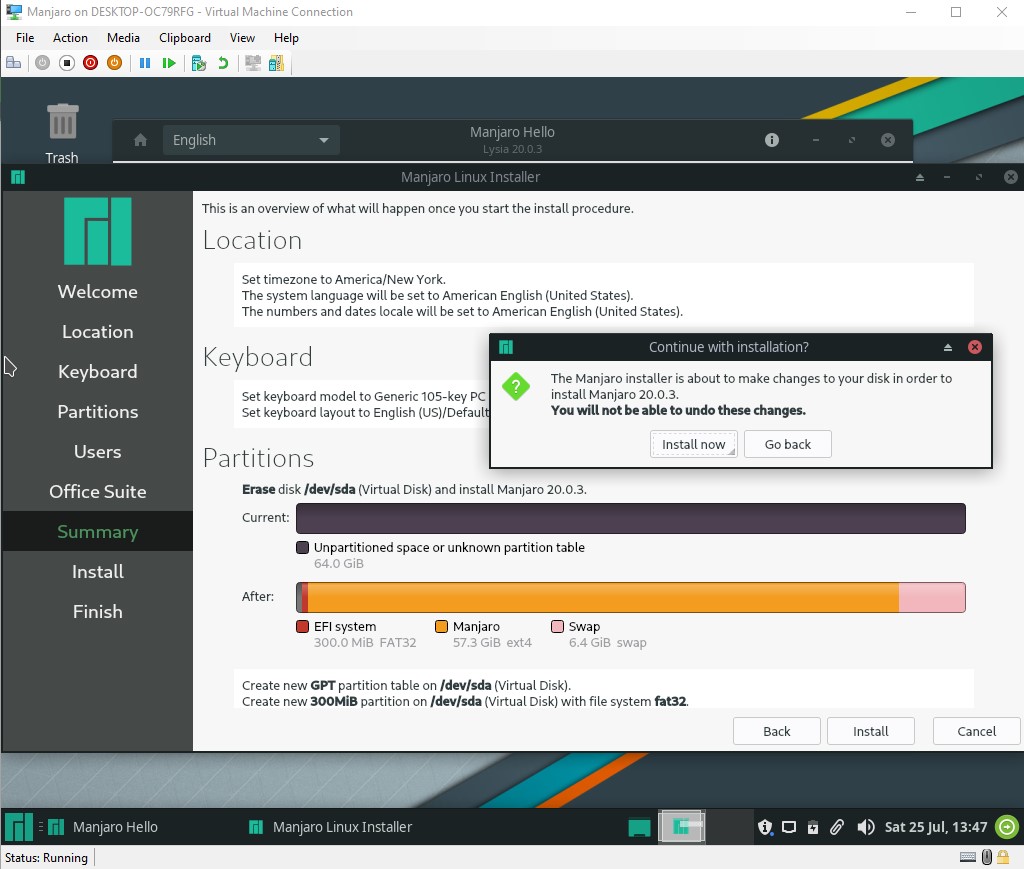
Finally we get to the summary page. Clicking “Install” gives us one final “point of no return” warning.
There will be various messages as the progress bar fills. Eventually you will be done!
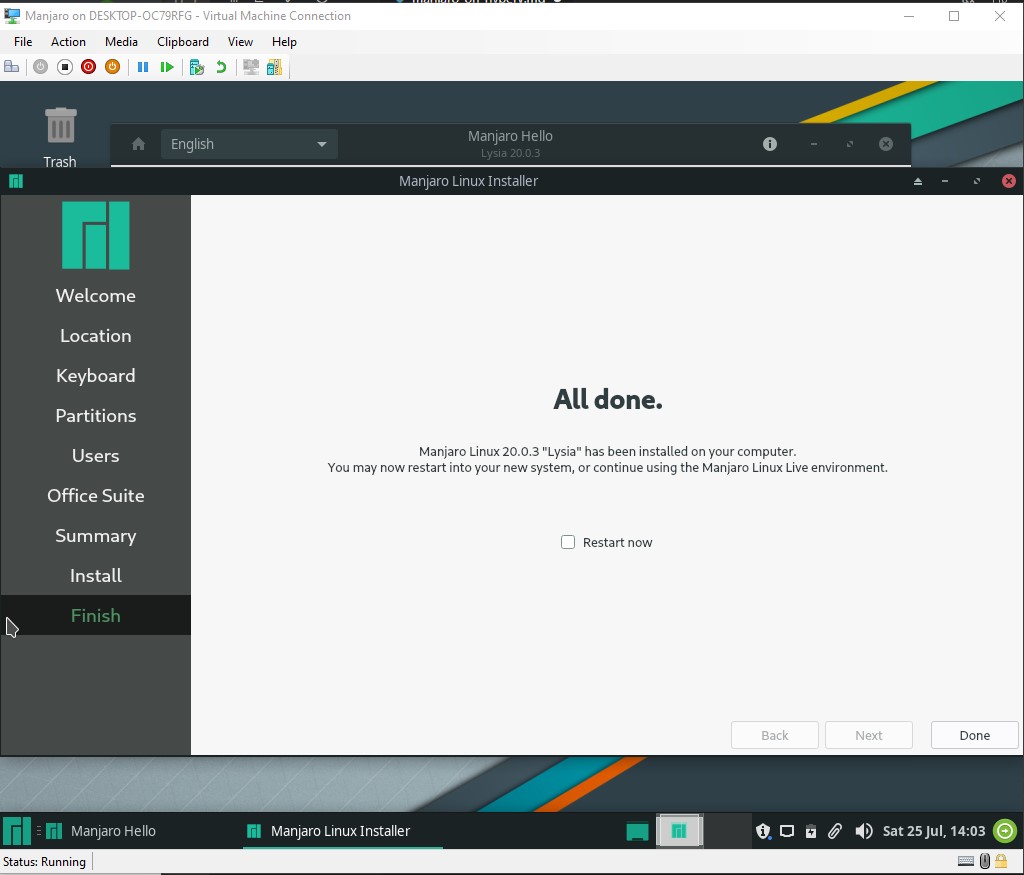
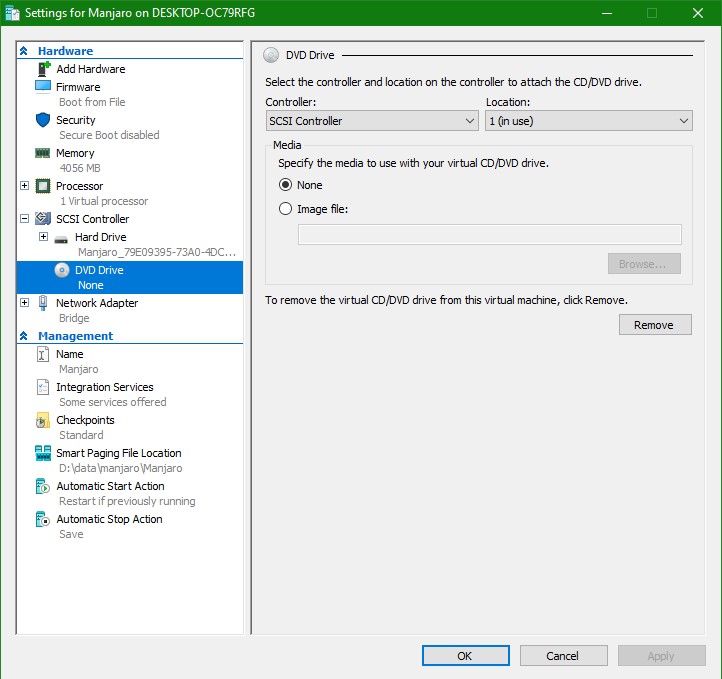
You can either check the “restart now” box, or manually restart. When the various console messages finally disappear, go into the “file” menu, settings, to the virtual dvd drive, and select “none”. This takes our install “disc” out of the drive.
We can then wait. If you are paying attention, you will see the HyperV Logo, then a black screen, then the HyperV Logo again. It won’t really do much past here, hung up like it was before when we had to load the display driver manually.
Push Control + Alt + F2 again and you will see a log in screen, this time with your machine name! Enter your user and password to log in.
We still need a display driver, but the one we were loading for the installer runs pretty badly. So instead, we are going to set up a better one. See the Arch Wiki on more details.
We will need to run the following code:
sudo pacman –Sy
sudo pacman –S git
cd Downloads
git clone https://github.com/Microsoft/linux-vm-tools.git ./linux-vm-tools
cd linux-vm-tools/arch
./makepkg.sh
sudo ./install.sh
Explaination:
sudo pacman –Sy– temporarily as the root user, update the pacman repositorysudo pacman –S git– temporarily as the root user, search for and install the git source control system git-scmcd Downloads– move to a directory where we can download our source code to build our drivergit clone https://github.com/Microsoft/linux-vm-tools.git ./linux-vm-tools– using git, pull down the source code and store in the linux-vm-tools directorycd linux-vm-tools/arch– move to the “arch” build directory./makepkg.sh– run the script to handle the setup, this will download and build many packages and will take a while to complete, and may ask for your password as it builds things.sudo ./install-config.sh– temporarily as the root user, install our new tools.
After the install is finished, there is a message about .xinirc
This is a configuration file for “x” or the graphical desktop environment.
We need to remove one section from it to be able to run in Enhanced Session mode.

Open this file
cd ~
vi .xinirc
And find the line:
local dbus_args=(--sh-syntax --exit-with-session)
Mini Vim Tutorial
In VIM, if you enter /dbus it will jump you to the first time that word is in the file, which is the line we want.
Press “i” to go into “insert” mode, arrow keys to move and then delete the offending flag.
When done editing, push escape, then enter “:wq” to write and quit the editor.
Edit it to remove the --exit-with-session flag.
We can now shut down our VM.
shutdown now
We need to run a single powershell command to toggle the Enhanced Sesssion Mode. (if you named your vm something other than “Manjaro”, replace that in the command). You will need to do this with a powershell running as administrator.
Set-VM -VMName Manjaro -EnhancedSessionTransportType HvSocket
Now we can boot up our Manjaro VM through Hyper-V, getting an option to choose resolution: (Note: it took a while staring at a black screen before this popped up)
And then a plain looking session/username/password login screen. Enter your Manjaro details but leave the Session as “Xorg”.

We should be all set up and good to go with our new shiny enhanced Manjaro VM!
Credits
This is written almost entirely based on the blog entry by gpburdell on the manjaro forums. I just wanted some more screenshots and adjusted wording. I claim no ownership of the information Original post: Manjaro Forums